Customizing Build Workflows in Visual Studio Online
21 February 2014 - Azure, TFS, Visual Studio
At Microsoft TechEd 2013 I did a session about continuous delivery in the cloud with Team Foundation Services. If you are interested you can watch a video and download the session material in this blog post. However, some time has gone by and things have developed. TFServices is now Visual Studio Online. Visual Studio 2013 is RTM. Git is now a first class citizen in the TFS and Visual Studio family. And last but not least Windows Azure Websites has shown tremendous progress.
For next week I am invited to do an updated version of last year's TechEd talk at ALM Days in Germany. The session will be in German so I only have a German abstract:
Team Foundation Services in der Cloud sind eine bequeme Sache. Keine Sorgen mehr mit der Hardwarewartung oder mit Softwareupdates. Buildserver inklusive. Aber ist die Lösung auch flexibel an die jeweiligen Projektbedürfnisse anpassbar? In dieser Session stellt Azure MVP Rainer Stropek Build in TFServices anhand eines durchgängigen Beispiels vor. Wir bleiben aber nicht beim Standardworkflow. Rainer zeigt, wie man auch in der Cloud den Buildworkflow anpassen und sogar um eigene Build-Activities erweitern kann.
In this blog post I summarize what has changed since my session in summer last year at TechEd.
If you want to play with the sample, feel free to download it from my Samples project on GitHub.
Git
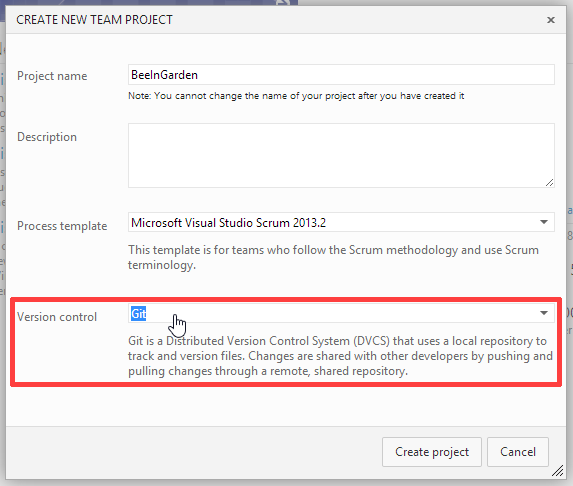
If you start with Visual Studio Online today, I recommend using Git as your version control system. The integration in TFS is great and the tooling in Visual Studio 2013 is awesome.
If you are not familiary with Git, I recommend reading Scott Chacon' Pro Git book. It is a great introduction to Git's underlying ideas and concepts and it is free.
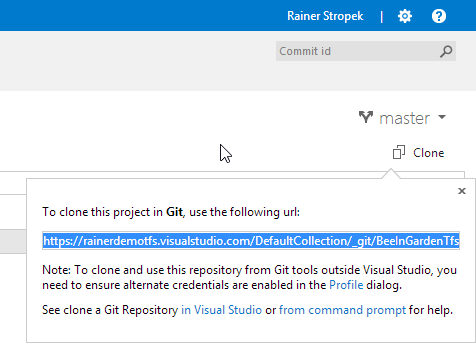
Once you have created your project in Visual Studio online, you can use Git tooling in Visual Studio 2013 or the Git command line tools to connect with your project. All you need is the url of the Git repo in the cloud:
Windows Azure Websites (WAWS)
Now that we have TFS, we can create our WAWS. If you haven't checked out WAWS yet or your last contact with WAWS is quite a while ago, take the time to check out the latest WAWS features Microsoft launched. In my opinion WAWS is by far the greatest cloud offering from Microsoft for developers today - and it is still getting a lot of love from the developers from Redmond so we can even expect much more in the future.
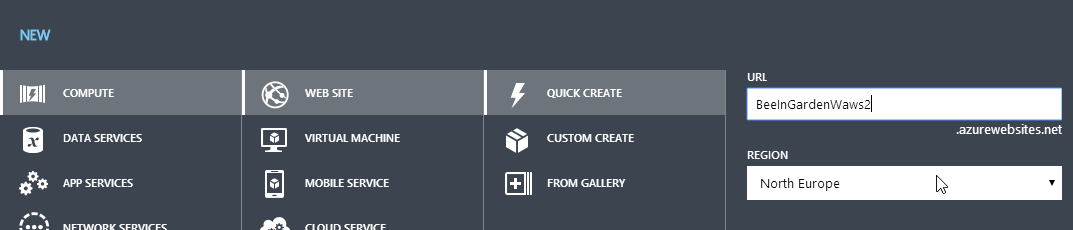
For my sample you will need to create a website and a Windows Azure SQL Database.
In my demo scenario I will create two different database: One for development and one for production. The connection string to the development environment will be part of the application's config file. Therefore they will be check in into Git. You should never check in production credentials. I recommend linking your WAWS with your production database instead:

This will add a connection string configuration setting to your WAWS instance:
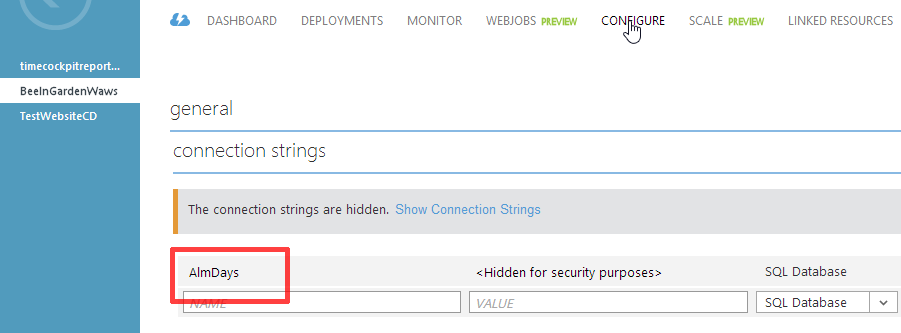
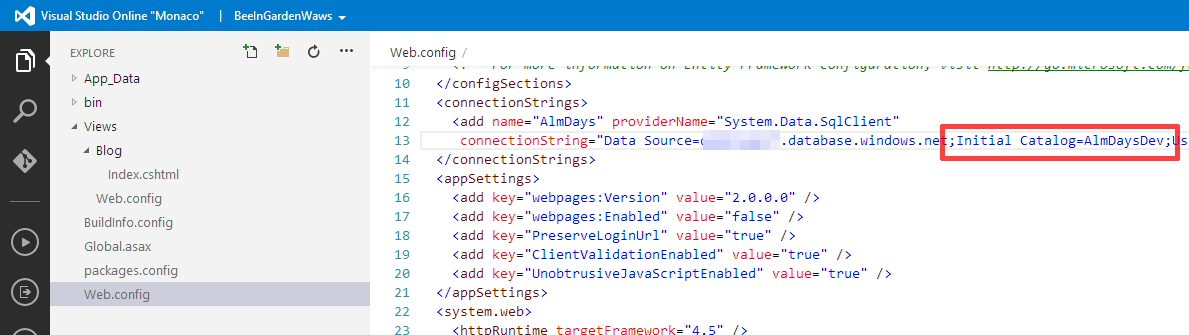
Note that this does not change your web.config file. It overrides the config setting at runtime. BTW - during the session I will show the "Monaco" preview of WAWS to verify that our web.config has not been changed. If you follow along, you have to be patient for a few more moments. We have not deployed our code yet.
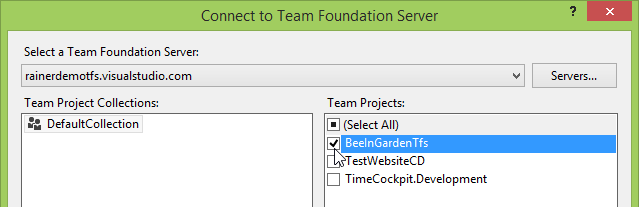
Last but not least we have to link WAWS with TFS. This is done in the Windows Azure management portal. You will have to enter the url of your Visual Studio online account and enter your Microsoft Account credentials. That's it. It will be done in a few seconds.
Manual Deployment
Now that we have set up TFS and WAWS, we can start coding. As a starting point you can grab the code for my sample from GitHub and copy it into the directory into which you have cloned your TFS Git repository.
Next, I recommend to try the sample locally. Open it in Visual Studio 2013 and build it manually. If you succeed, try to run it locally (don't forget to update connection string in the config files; they should point to the development database). If this works, too, try to deploy the application to WAWS manually (just click Deploy in the context menu of the web project and follow the instructions on the screen). Does ist work?
Automated Build
Connecting your WAWS with TFS automatically created a build definition for you. By default, the build will be triggered whenever you check something in.
You can already try the automated build. Check in my sample and watch the build process in Visual Studio of in the Visual Studio Online portal. The sample does not only contain the website, it also contains tests and a class library. The web project will only be deployed to WAWS if the tests succeed.
Customize the Build
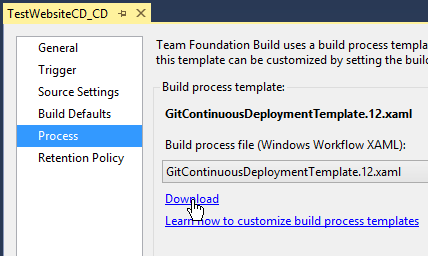
Build in Visual Studio Online is not a black box. You can examine the build workflow and also modify it. You can download the build process template in the build definition:
It is recommended to not edit the build process XAML without a solution. You should create an empty workflow project as described in this MSDN article. Create a copy of the downloaded build process XAML and add it to the workflow project.
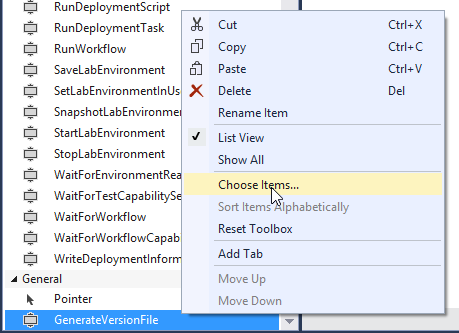
In my demo scenario, I would like to auto-generate a version.cs file so that all assemblies contain an auto-generated version number. The calculation of the version number is done in a custom build component. It is part of my demo code (solution GenerateVersionFile.sln). Open and build it. Go back to the workflow project created before and add the build component to your toolbox:
Here is a step-by-step description of the scenario I demonstrate during the session:
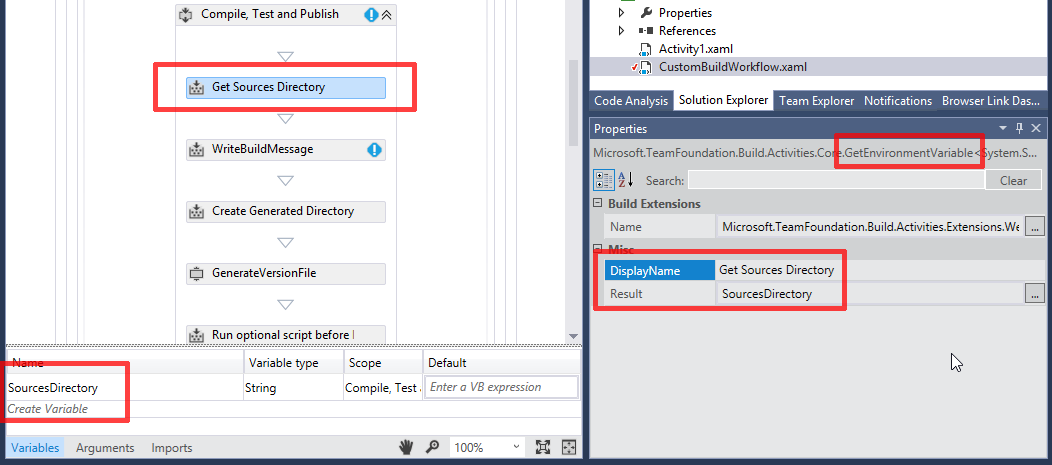
- Get the Microsoft.TeamFoundation.Build.Activities.Extensions.WellKnownEnvironmentVariables.SourcesDirectory workflow property using the GetEnvironmentVariable activity:
- Use the CreateDirectory activity to create a Generated helper directory: System.IO.Path.Combine(SourcesDirectory, "Generated")
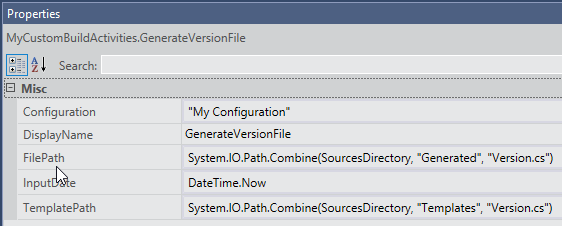
- Next, add the custom GenerateVersionDirectory activity. It will generate a version file in the Generated directory.
- Last but not least you have to change the command line arguments for MSBuild:
String.Format("/p:SkipInvalidConfigurations=true {0} /p:VersionFile=""{1}""", AdvancedBuildSettings.GetValue(Of String)("MSBuildArguments", String.Empty), System.IO.Path.Combine(SourcesDirectory, "Generated", "Version.cs"))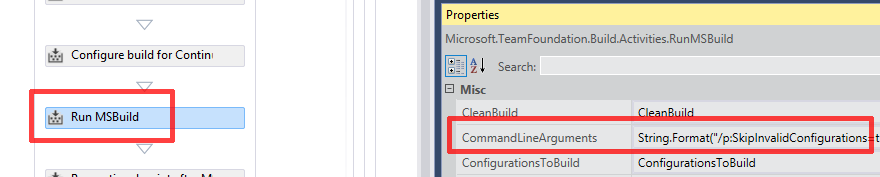
Publishing the Build Configuration
Now that we have set up the build locally, we have to make it available to Visual Studio Online:
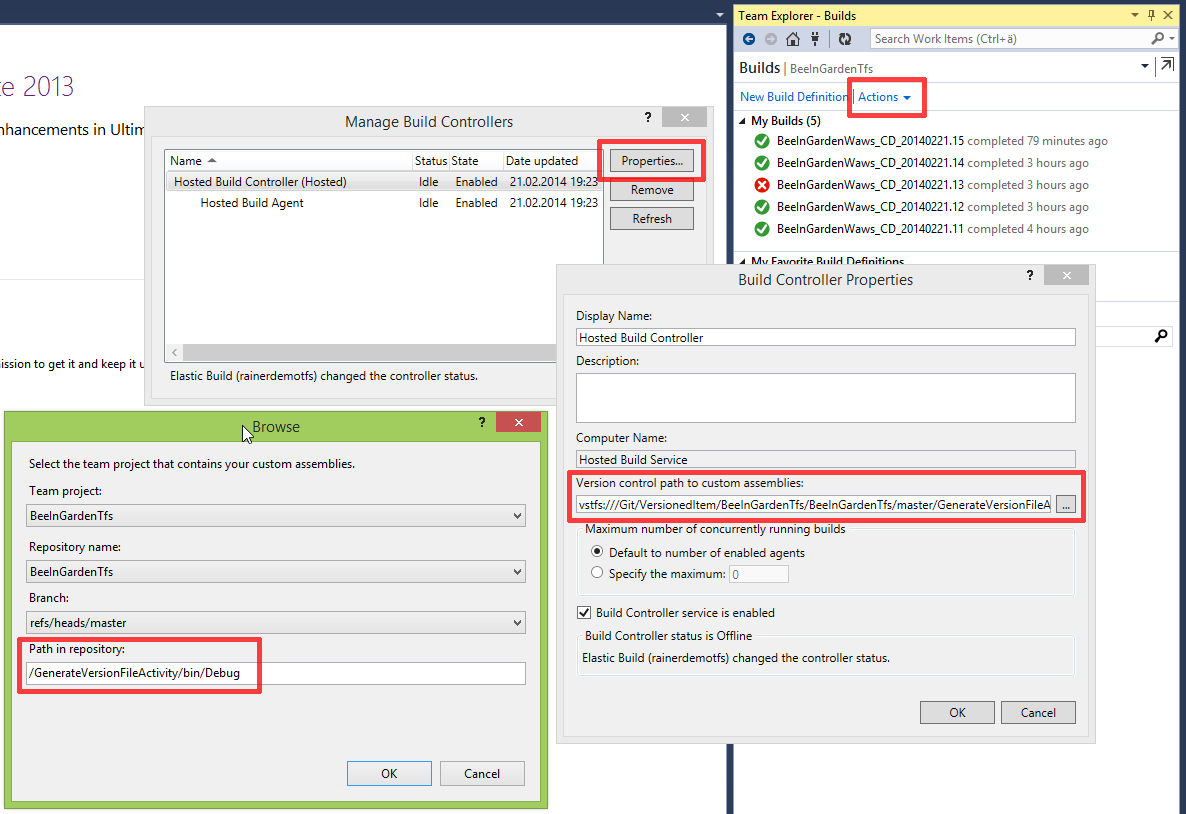
- First you have to check in the DLL containing the custom build activity (GenerateVersionFileActivity.dll) in Git. Remember the directory into which you put the DLL.
- Next you have to tell Visual Studio Online where to look for custom build activities (click to enlarge):
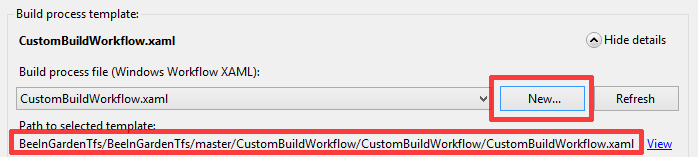
- Next you have to check in the XAML file with the custom build workflow.
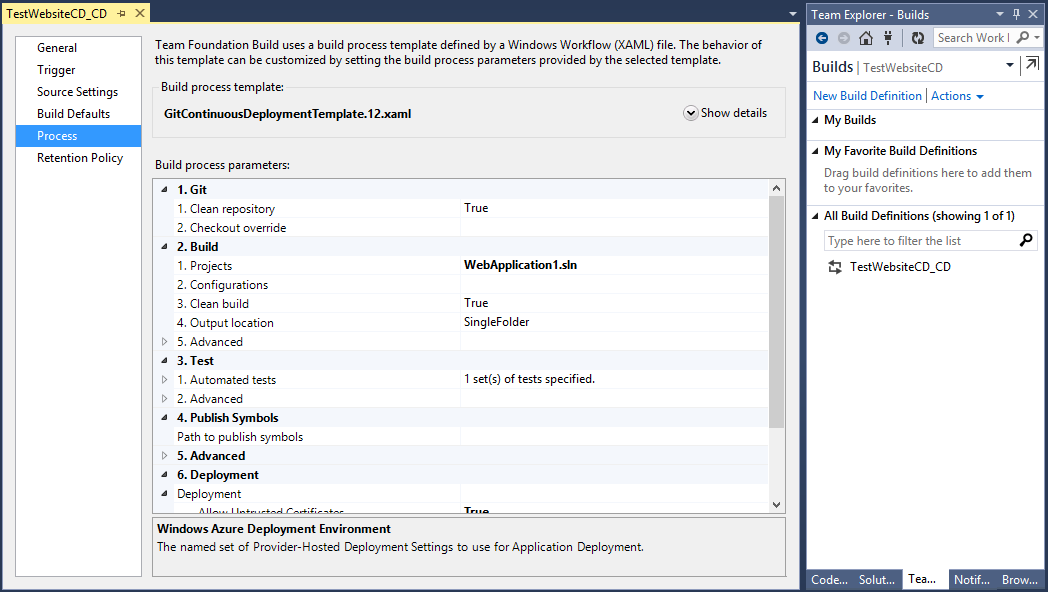
- Last but not least you have to change your build configuration so that it executes your custom build workflow instead of the standard one:
That's it. Trigger a new build and watch it progress. When it is done, you can download the drop location and check whether the DLL version has been set correctly:

Content