Learn by Example - AngularJS, NodeJS, and Typescript
04 June 2014 - TypeScript, Visual Studio
In this blog post, I would like to summarize a talk I gave at the JavaScript Day of the International PHP Conference in Berlin 2014. The idea of the talk is to demonstrate the power of NodeJS + TypeScript + AngularJS.
The entire code is available in my GitHub repository.
Step 1: Let’s Build a Web API
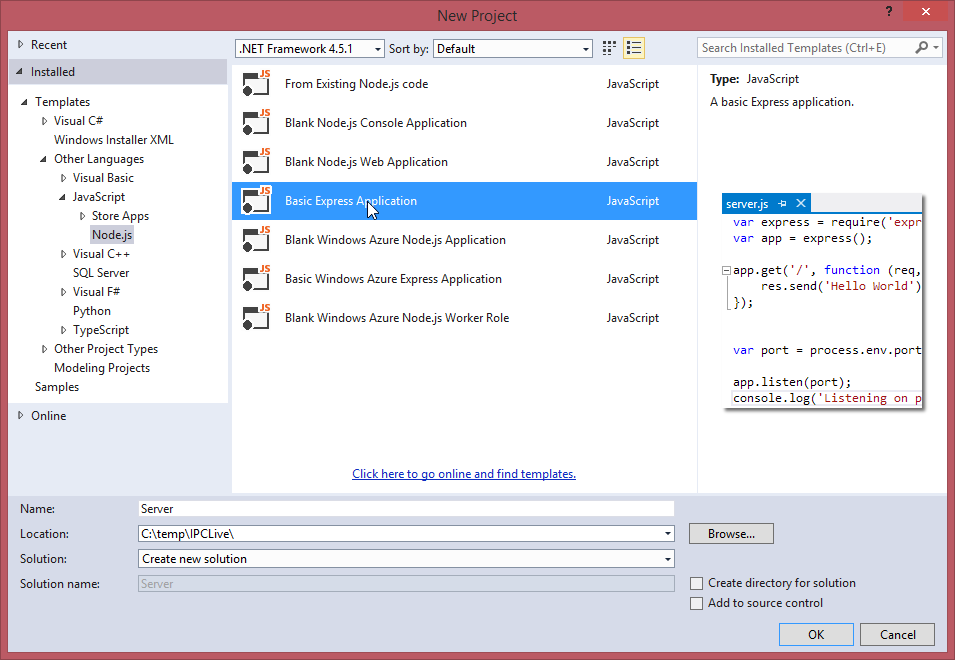
As a first step in our sample we want to create a small web API using NodeJS + TypeScript. Recently, Microsoft has launched its NodeJS Tools for Visual Studio. So if you are used to developing with Visual Studio, you can stick to the IDE you are used to even when writing NodeJS code.
As a starting point we create a new NodeJS application called Server in Visual Studio. Note that you have to have the NodeJS Tools installed in Visual Studio 2013 Update 2 for that.
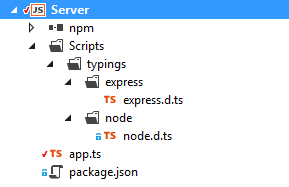
The resulting project contains a lot of stuff that we do not need for our example. You can clean up the project and delete all HTML/CSS-generation-related stuff until your project structure looks something like this:
The project template already added the express framework. It enables us to build web APIs without having to care for all the low-level details. As we are not only going to implement GET requests but POST requests (for inserting new data), too, we will need to parse JSON in the HTTP request body. For that, we need the body-parser module, too. Therefore we have to extend the package.json file a bit:
{
"name": "AngularRegistrationSample",
"version": "0.0.0",
"description": "Example",
"main": "app.js",
"author": {
"name": "Rainer Stropek",
"email": "rainer@software-architects.at"
},
"dependencies": {
"body-parser": "^1.3.0",
"express": "^3.10.2"
}
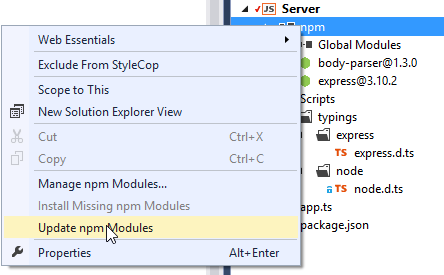
}Well, strictly speaking we would not have to edit package.json by hand. We also do not need to call npm install in a command line prompt to download the additional package. The NodeJS tools integrate these things directly into Visual Studio (similar to NuGet which some of you might know from .NET development).
Now we can implement our web API. Here is the source code. Please take a look at the comments. They will lead you through this sample step by step.
The important part to note here is the Typescript integration. On the server side, we use a Typescript interface to define a data structure for our web API. Additionally, we add a class with business logic.
Remember these types, we will reuse exactly the same code on the client-side later. That’s the beauty of having the same language – Typescript – on the client and the server.
// Import express with body parsers (for handling JSON)

import express = require('express');
var bodyParser = require('body-parser');


// Business logic and data structures

interface IRegistration {
    salutation: string;
    name: string;
    age: number;
}

class Registration implements IRegistration {
    public salutation: string;
    public name: string;
    public age: number;

    constructor(registration: IRegistration) {
        this.salutation = registration.salutation;
        this.name = registration.name;
        this.age = registration.age;
    }

    public isValid() {
        return this.age >= 18;
    }
}

// Sample repository of registrations (for demo purposes just in memory

var registrations = new Array<IRegistration>();
registrations.push(
    { salutation: "Mr.", name: "Tom Tailor", age: 20 },
    { salutation: "Mr.", name: "Max Muster", age: 19 });


// Setup express

var app = express();
app.use(bodyParser());

// Uncommend this line to demo basic auth

// app.use(express.basicAuth((user, password) => user == "user2" && password == "password"));


// Implement web API

app.get("/api/registrations", (req, res) => {
    // Get all registrations

    res.send(registrations);
});

// Register

app.post("/api/register", (req, res) => {
    var registration = new Registration(<IRegistration>req.body);
    if (registration.isValid()) {
        registrations.push(registration);
        res.send(201);
    }
    else {
        res.send(400);
    }
});

// Listen for HTTP traffic

app.listen(process.env.PORT || 3000);
Step 2: Test Your Web API
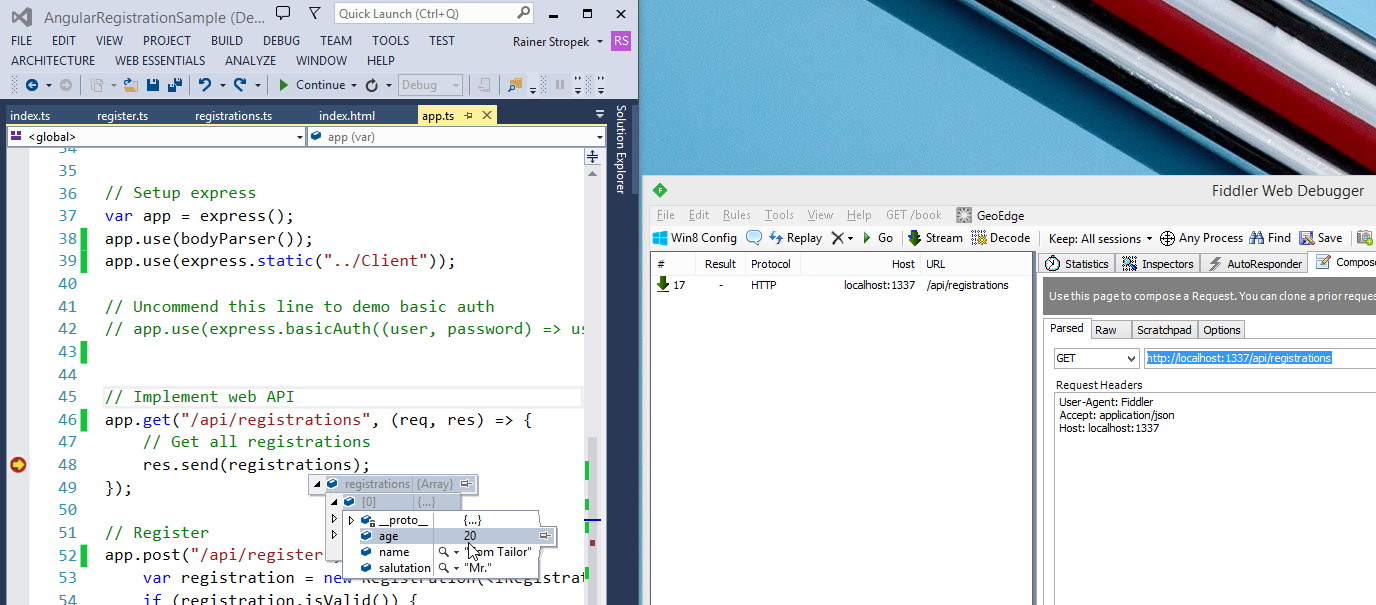
With the NodeJS Tools for Visual Studio you can debug your code just be hitting F5. Try to set breakpoints in your Typescript NodeJS code. It will work just fine. You can even use features like Watch Expressions, etc. Nice, isn’t it?
The following screenshot shows how to create test calls to your web API with Fiddler. It also shows how the request hits a breakpoint in NodeJS Typescript code in Visual Studio and demonstrates watch expressions.
Step 3: Build the Client
Preparing the Project
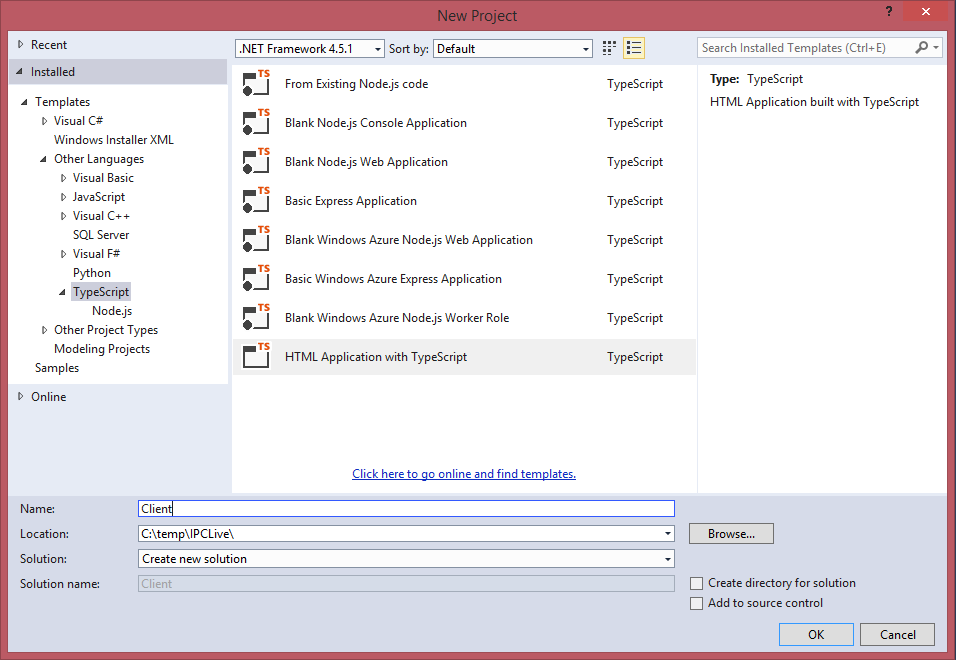
Next, we create a client application using AngularJS and Typescript. For that, create a new Typescript project called Client in Visual Studio:
We need a few more components for our clients. In contrast to NodeJS where we used NPM (Node Package Manager), we now use NuGet. You can either right-click on the project, select Manage NuGet Packages and select the packages by hand or you can copy/past the following code in your packages.config file:
<?xml version="1.0" encoding="utf-8"?>
<packages>
  <package id="angularjs" version="1.2.16" targetFramework="net451" />
  <package id="angularjs.TypeScript.DefinitelyTyped" version="1.0.4" targetFramework="net451" />
  <package id="bootstrap" version="3.1.1" targetFramework="net451" />
  <package id="jQuery" version="1.9.1" targetFramework="net451" />
  <package id="jquery.TypeScript.DefinitelyTyped" version="0.8.7" targetFramework="net451" />
</packages>
Angular Controllers in Typescript, Data Binding
First, let us display our list or existing registrations. For that, we need to create an AngularJS controller. Controller, like in MVC (Model-View-Controller). Take a look at the following code.
Do you recognize the code reuse from the server? The client and the server share the same data structure and the same business logic.
For the sake of simplicity, I copy the code from the server to the client. In practice, you would probably create a shared module and reuse identical files. If you follow along, call the following file registrations.ts.
// A simple logger interface to demonstrate AngularJS depdency injection.

// The implementatio of the logger is published in index.ts.

interface ILogger {
    log: (string) => void;
}


// Reused business logic and data structure from the server

class DefaultLogger implements ILogger {
    public log(text: string) {
        console.log(text);
    }
}

interface IRegistration {
    salutation: string;
    name: string;
    age: number;
}

class Registration implements IRegistration {
    public salutation: string;
    public name: string;
    public age: number;

    constructor(registration: IRegistration) {
        this.salutation = registration.salutation;
        this.name = registration.name;
        this.age = registration.age;
    }

    public isValid() {
        return this.age >= 18;
    }
}


// The interface the Angular's $scope. Used to access the data structure for

// data binding in a type-safe way.

interface IRegistrationsViewModel extends ng.IScope {
    registrations: Array<IRegistration>;
    refresh: () => void;
}

// The controller class. Note that it uses Angular's dependency injection to

// get the $http service (for http requests) and the logger (see above).

//

class RegistrationsViewModel {
    constructor($scope: IRegistrationsViewModel, $http: ng.IHttpService, private logger: ILogger) {
        $scope.registrations = new Array<IRegistration>();
        $scope.refresh = () => {
            logger.log("Requesting...");
            $http.get<Array<IRegistration>>("/api/registrations")
                .success(registrations => {
                    registrations.forEach(r => $scope.registrations.push(r));
                });
        };
    }
}
Having this controller, building the data-bound client code is a piece of cake. Here is the HTML from registrations.html including the AngularJS data binding attributes:
<h1>Registration Sample</h1>

<button type="button" class="btn btn-primary" ng-click="refresh()">Refresh</button>

<table class="table" style="max-width: 300px;">
    <thead>
        <tr>
            <th>Salutation</th>
            <th>Name</th>
            <th>Age</th>
        </tr>
    </thead>
    <tbody>
        <tr ng-repeat="reg in registrations">
            <td></td>
            <td></td>
            <td></td>
        </tr>
    </tbody>
</table>

<p>Do you want to <a href="#register">register</a>?</p>
We do not only want to view the registrations. We also want to be able to register new people. Therefore we create an additional controller called register.ts:
interface IRegisterViewModel extends ng.IScope, IRegistration {
    save: () => void;
}

class RegisterViewModel {
    constructor($scope: IRegisterViewModel, $http: ng.IHttpService, private logger: ILogger) {
        $scope.save = () => {
            $http.post("/api/register", { name: $scope.name, salutation: $scope.salutation, age: $scope.age }, { headers: { "Content-Type": "application/json" } })
                .success(_ => {
                    alert("You are registered!");
                })
                .error(_ => {
                    alert("Sorry, not possible!");
                });
        }
    }
}
And here is the corresponding HTML file called register.html:
<h1>Registration Sample</h1>

<form role="form" style="max-width: 300px;">
    <div class="form-group">
        <label for="salutation">Salution:</label>
        <select class="form-control" ng-model="salutation">
            <option value="Mr." ng-selected="salutation=='Mr.'">Mr.</option>
            <option value="Ms." ng-selected="salutation=='Ms.'">Ms.</option>
        </select>
        <div class="form-group">
            <label for="name">Name:</label>
            <input type="text" class="form-control" placeholder="Name" ng-model="name" />
        </div>
        <div class="form-group">
            <label for="name">Age:</label>
            <input type="text" class="form-control" placeholder="Age" ng-model="age" />
        </div>
        <button type="button" class="btn btn-primary" ng-click="save()">Register</button>
    </div>
</form>

<p>Do you want to view <a href="#/">registrations</a>?</p>
Single Page App (SPA)
Did you recognize that the HTML code above is not complete? They have only been fragments. The reason for this is that we want to use AngularJS routing service to build a Single Page App (SPA). A SPA loads a single file and loads the necessary view fragments in the background.
We need an HTML file that hosts our fragments. Here is the code for index.html. Note the attribute ng-view. This is where the fragments shown above will be inserted.
<!DOCTYPE html>

<html lang="en">
<head>
    <meta charset="utf-8" />
    <title>TypeScript HTML App</title>

    <link rel="stylesheet" href="Content/bootstrap.css" type="text/css" />

    <script src="Scripts/jquery-1.9.1.js"></script>
    <script src="Scripts/angular.js"></script>
    <script src="Scripts/angular-route.js"></script>
    <script src="Scripts/bootstrap.js"></script>

    <script src="registrations.js"></script>
    <script src="register.js"></script>
    <script src="index.js"></script>
</head>
<body ng-app="RegistrationApp">
    <div ng-view></div>
</body>
</html>
Finally, here is the corresponding Typescript file index.ts:
angular.module("RegistrationApp", ["ngRoute"])
    // The logger to demonstrate AngularJS dependency injection

    .factory("logger", () => new DefaultLogger())
    // Our controllers for the two views

    .controller("RegistrationsController", RegistrationsViewModel)
    .controller("RegisterController", RegisterViewModel)
    // The routes for the SPA

    .config(($routeProvider: ng.route.IRouteProvider) => {
        $routeProvider
            .when("/", {
                templateUrl: "registrations.html", controller: "RegistrationsController"
            })
            .when("/register", {
                templateUrl: "register.html", controller: "RegisterController"
            });
    });
Step 4: Joining Server and Client
So how can we bring server and client together? It turns out that the express framework we used in our NodeJS server can serve static files, too. Just add one line to the server’s app.ts file:
...
// Setup express
var app = express();
app.use(bodyParser());
app.use(express.static("../Client")); // <== ADD THIS LINE
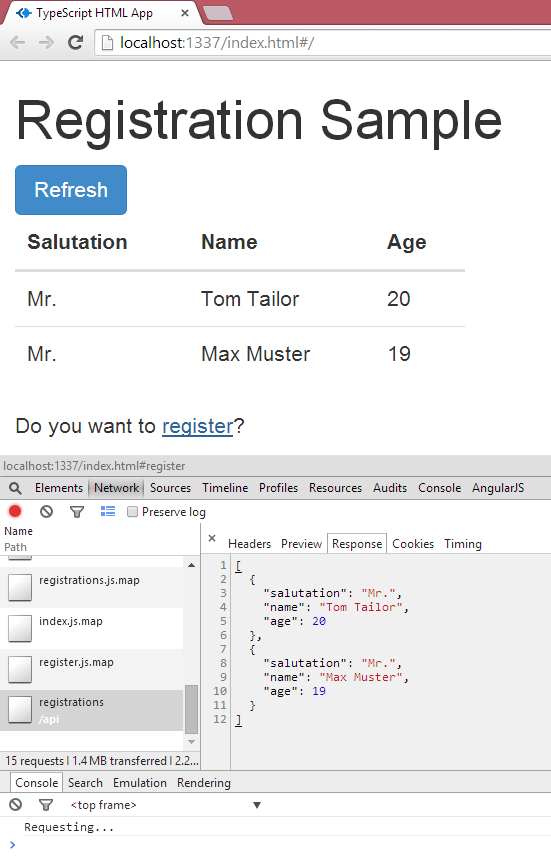
...That’s it. You can try your client. The following screenshot shows our client in Chrome’s debugger where you can watch the REST API work in the background.
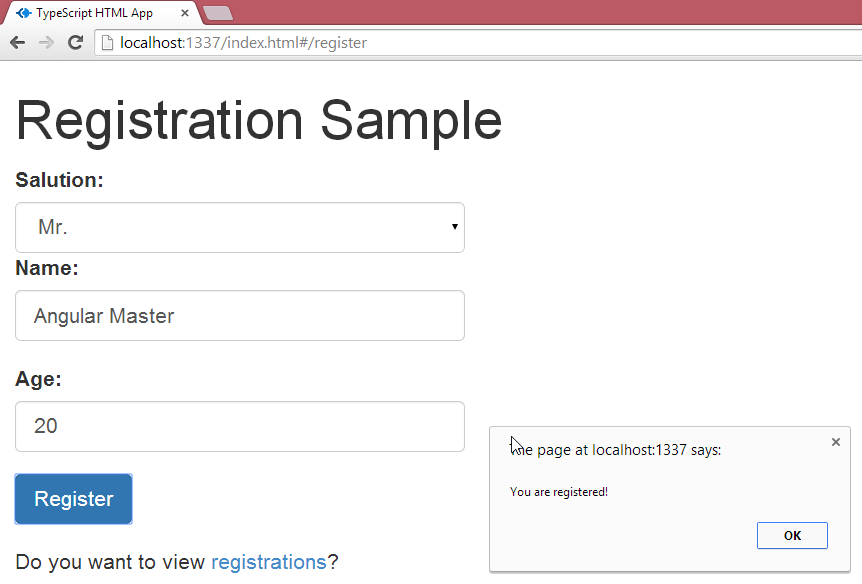
The following screenshot shows the registration form:
Play with your application. Try debugging NodeJS and client-side Typescript code. Test your business logic. Maybe add another controller. If you want to experiment, add basic authentication to your web API and create a third view for logging in.
Top Five Take-Aways
- NodeJS + Typescript development now works perfectly fine with the new NodeJS Tools for Visual Studio.
- Typescript gives you type-safety – on the server as well as on the client.
- Easily share data structures (interfaces) and business logic between client and server. This reduces implementation effort.
- Data binding greatly reduces the amount of code you have to write for data oriented web applications.
- The MVC patterns enable you to write unit tests for your UI logic and your business logic without having to create automated UI tests.
Content

Tags
.NET (40) ADC (1) Android (1) Angular (4) AngularJS (3) ASP.NET (7) ASPNET Core (1) ASPNET (1) Assembler (1) Azure (62) BASTA (2) Blazor (2) C# (35) C (1) CLI (2) Cloud (1) CoderDojo (1) Conferences and Workshops (2) Container (4) CPP (3) CSharp (5) DevOps (2) Docker (12) Documentation (1) DotNet (1) ECMAScript (1) GAB (1) HTML (2) HTML5 (2) Iron Python (1) JavaScript (3) JWT (1) Markdown (1) MEF (3) Microservices (3) Microsoft (2) Minecraft (2) Mobile (2) Node (1) Node.js (2) NPM (1) OData (5) Presentations (4) Project Management (2) Registry (1) Roslyn (2) Silverlight (3) Software Quality Days (1) SPA (1) SQL (3) SQLCE (1) SVG (1) TechDays (1) Techorama (1) Testing (1) TFS (9) time cockpit (4) TypeScript (18) Visual Studio (37) VSCode (1) VSTS (2) WebAssembly (2) Windows (1) WPF (9) Yarn (1)Authors
Related Posts
Techorama Belgium 2018 - Async Programming with JavaScript and TypeScript
23 May 2018 - JavaScript, TypeScript
Its Techorama in Belgium again. This time I speak about async programming with JavaScript and TypeScript. In this blog post I would like to share my sample code and the recording of the session.

Winner Winner Chicken Dinner
17 January 2018 - Visual Studio, Software Quality Days, Testing, VSTS
Today, I had the honor to represent Microsoft at the Tools Challenge of the Software Quality Days 2018 in Vienna. The audience voted - and we won :-)

BASTA 2017 - Recordings and Session Material
27 September 2017 - BASTA, .NET, Docker, Microservices, Visual Studio, Yarn, NPM
September is BASTA! time. It has become a beloved tradition for me to travel in Autumn to Mainz to speak at the BASTA! conference. This year, my workshop, session and keynote topics were .NET, microservices and web dev technology. In this blog post I share my session material and recordings.